This is the most useful page on my website and will grow gradually over the months and years, I have quite a few useful techniques that I have developed over the last few months and have also had quite a few queries on my Social Media, so will get those up as I can get to them. Feel free to contact me with any constructive comments if you think I can improve any of them, comments are always welcome.
How To Dos:
#1 - How to Program a Loco Address using a Hornby Select
#2 - How to complete a Reachability Analysis
#3 - How to construct a baseboard, my top 5 tips
#4 - How to design your layout simply on a Computer
#5 - How to install Peco PL1000 Twistlock Point Motor
#6 - How to install TTS sound decoders, including iPhone speaker fixes
#7 - How to reinstall a driveshaft on a ViTrains Class 37
#8 - Beginners hints and tips for Sound Decoder Installs.
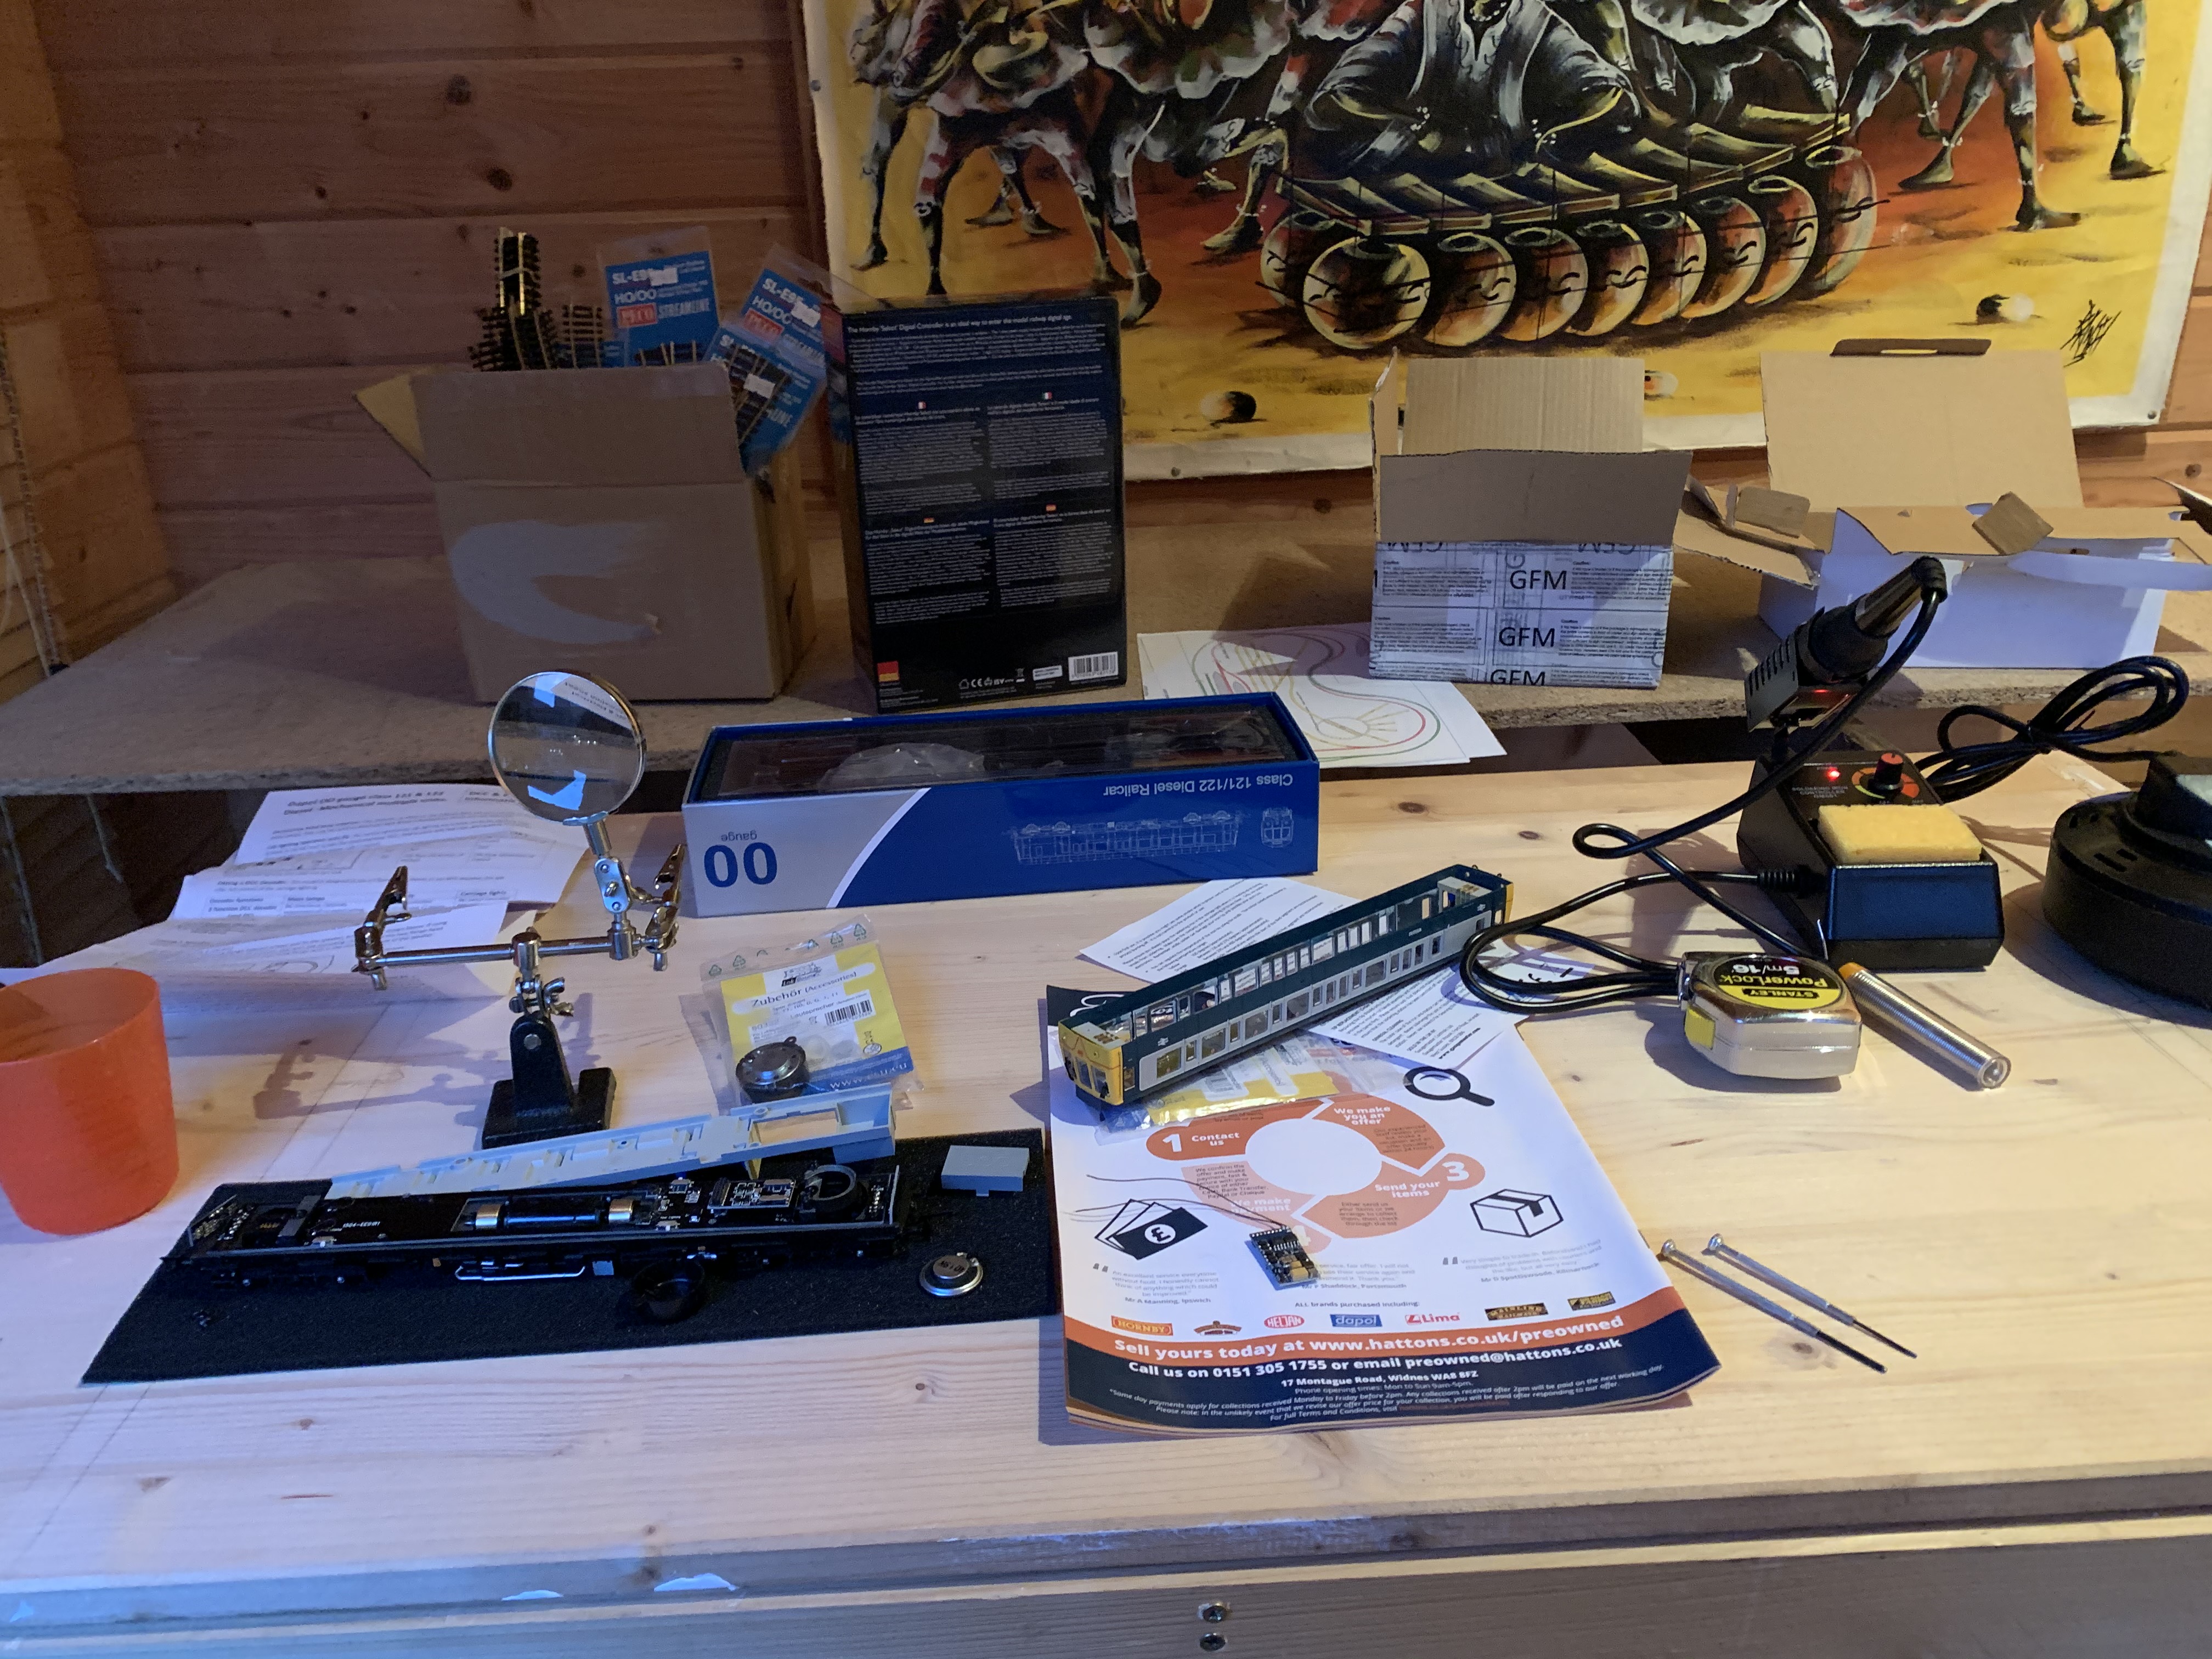
#9 - How to remove the body off a Dapol Class 121
The objective for this page is to provide particularly beginners with insights into the mistakes I've made and what you can do to avoid them, it also demonstrates what an absolute beginner with no artistic skills at all (seriously my Art teacher in school, said don't even bother you just can't do art, focus on science) can do in terms of modelling, and what an absolute beginner in terms of model railways can do in terms of construction. I will give an indication of how hard things are to do, using a simple "helping hand" scale of difficulty. Each of my "How To?" tasks will have this indicator, as I receive feedback I will adjust the scale accordingly.
.jpg)
| Level 1 | |
Very straightforward, dive straight in |
| Level 2 | |
Needs a bit of practice, try it out on a non-important piece first |
| Level 3 | |
Getting a little tricky, you might want to turn your radio (or my superb YouTube Channel) off so you can concentrate |
| Level 4 | |
My fingers (and eyes) weren't really designed for this, several hmmmmpppphhs will be exhaled, might take several attempts |
| Level 5 | |
Should I even be considering this? For 20 quid I could get a pro to do this for me...... hmmmmmm. |
Level 1
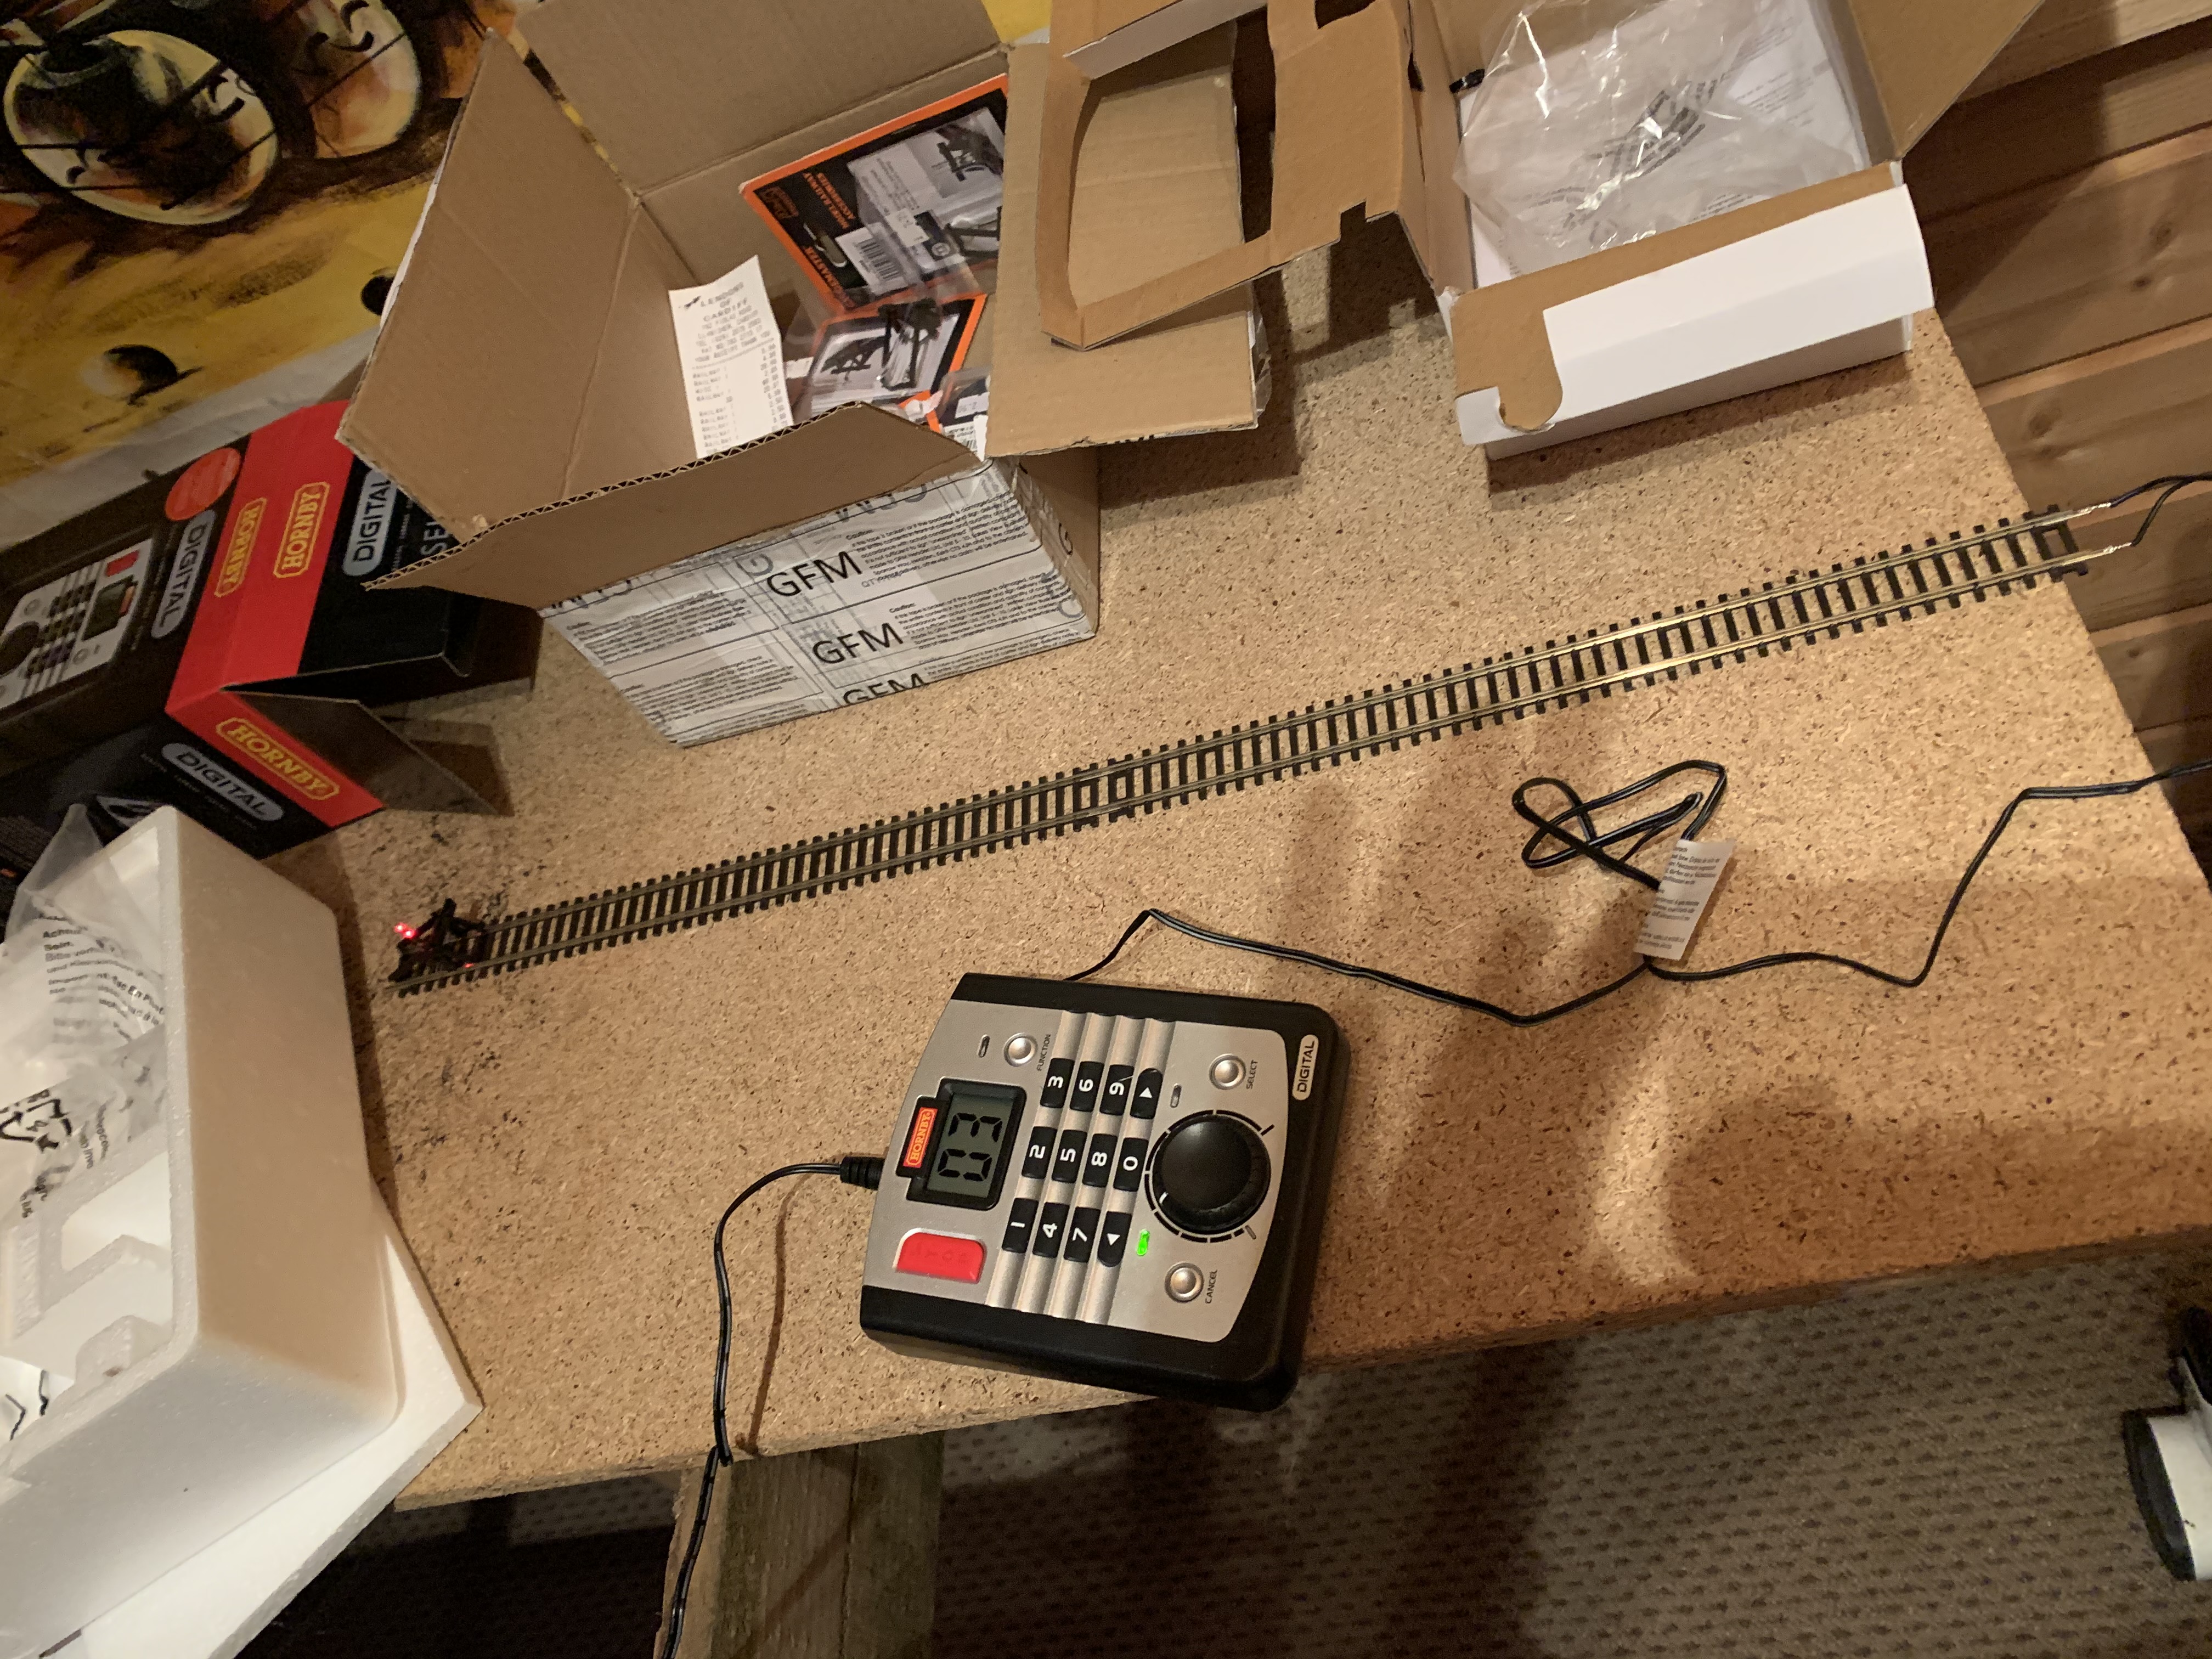
One of the fundamentals before you can get started using two locomotives (on a DCC layout) is to change the "address" of the locomotive. This is because unlike DC which works by changing the voltage on the track and thus increasing the speed on any motor that is connected to the track, DCC layouts use a chip within each locomotive that has a unique address which then means the power controller can control each locomotive independently, even if they are both operating on the same circuit.
Level 1
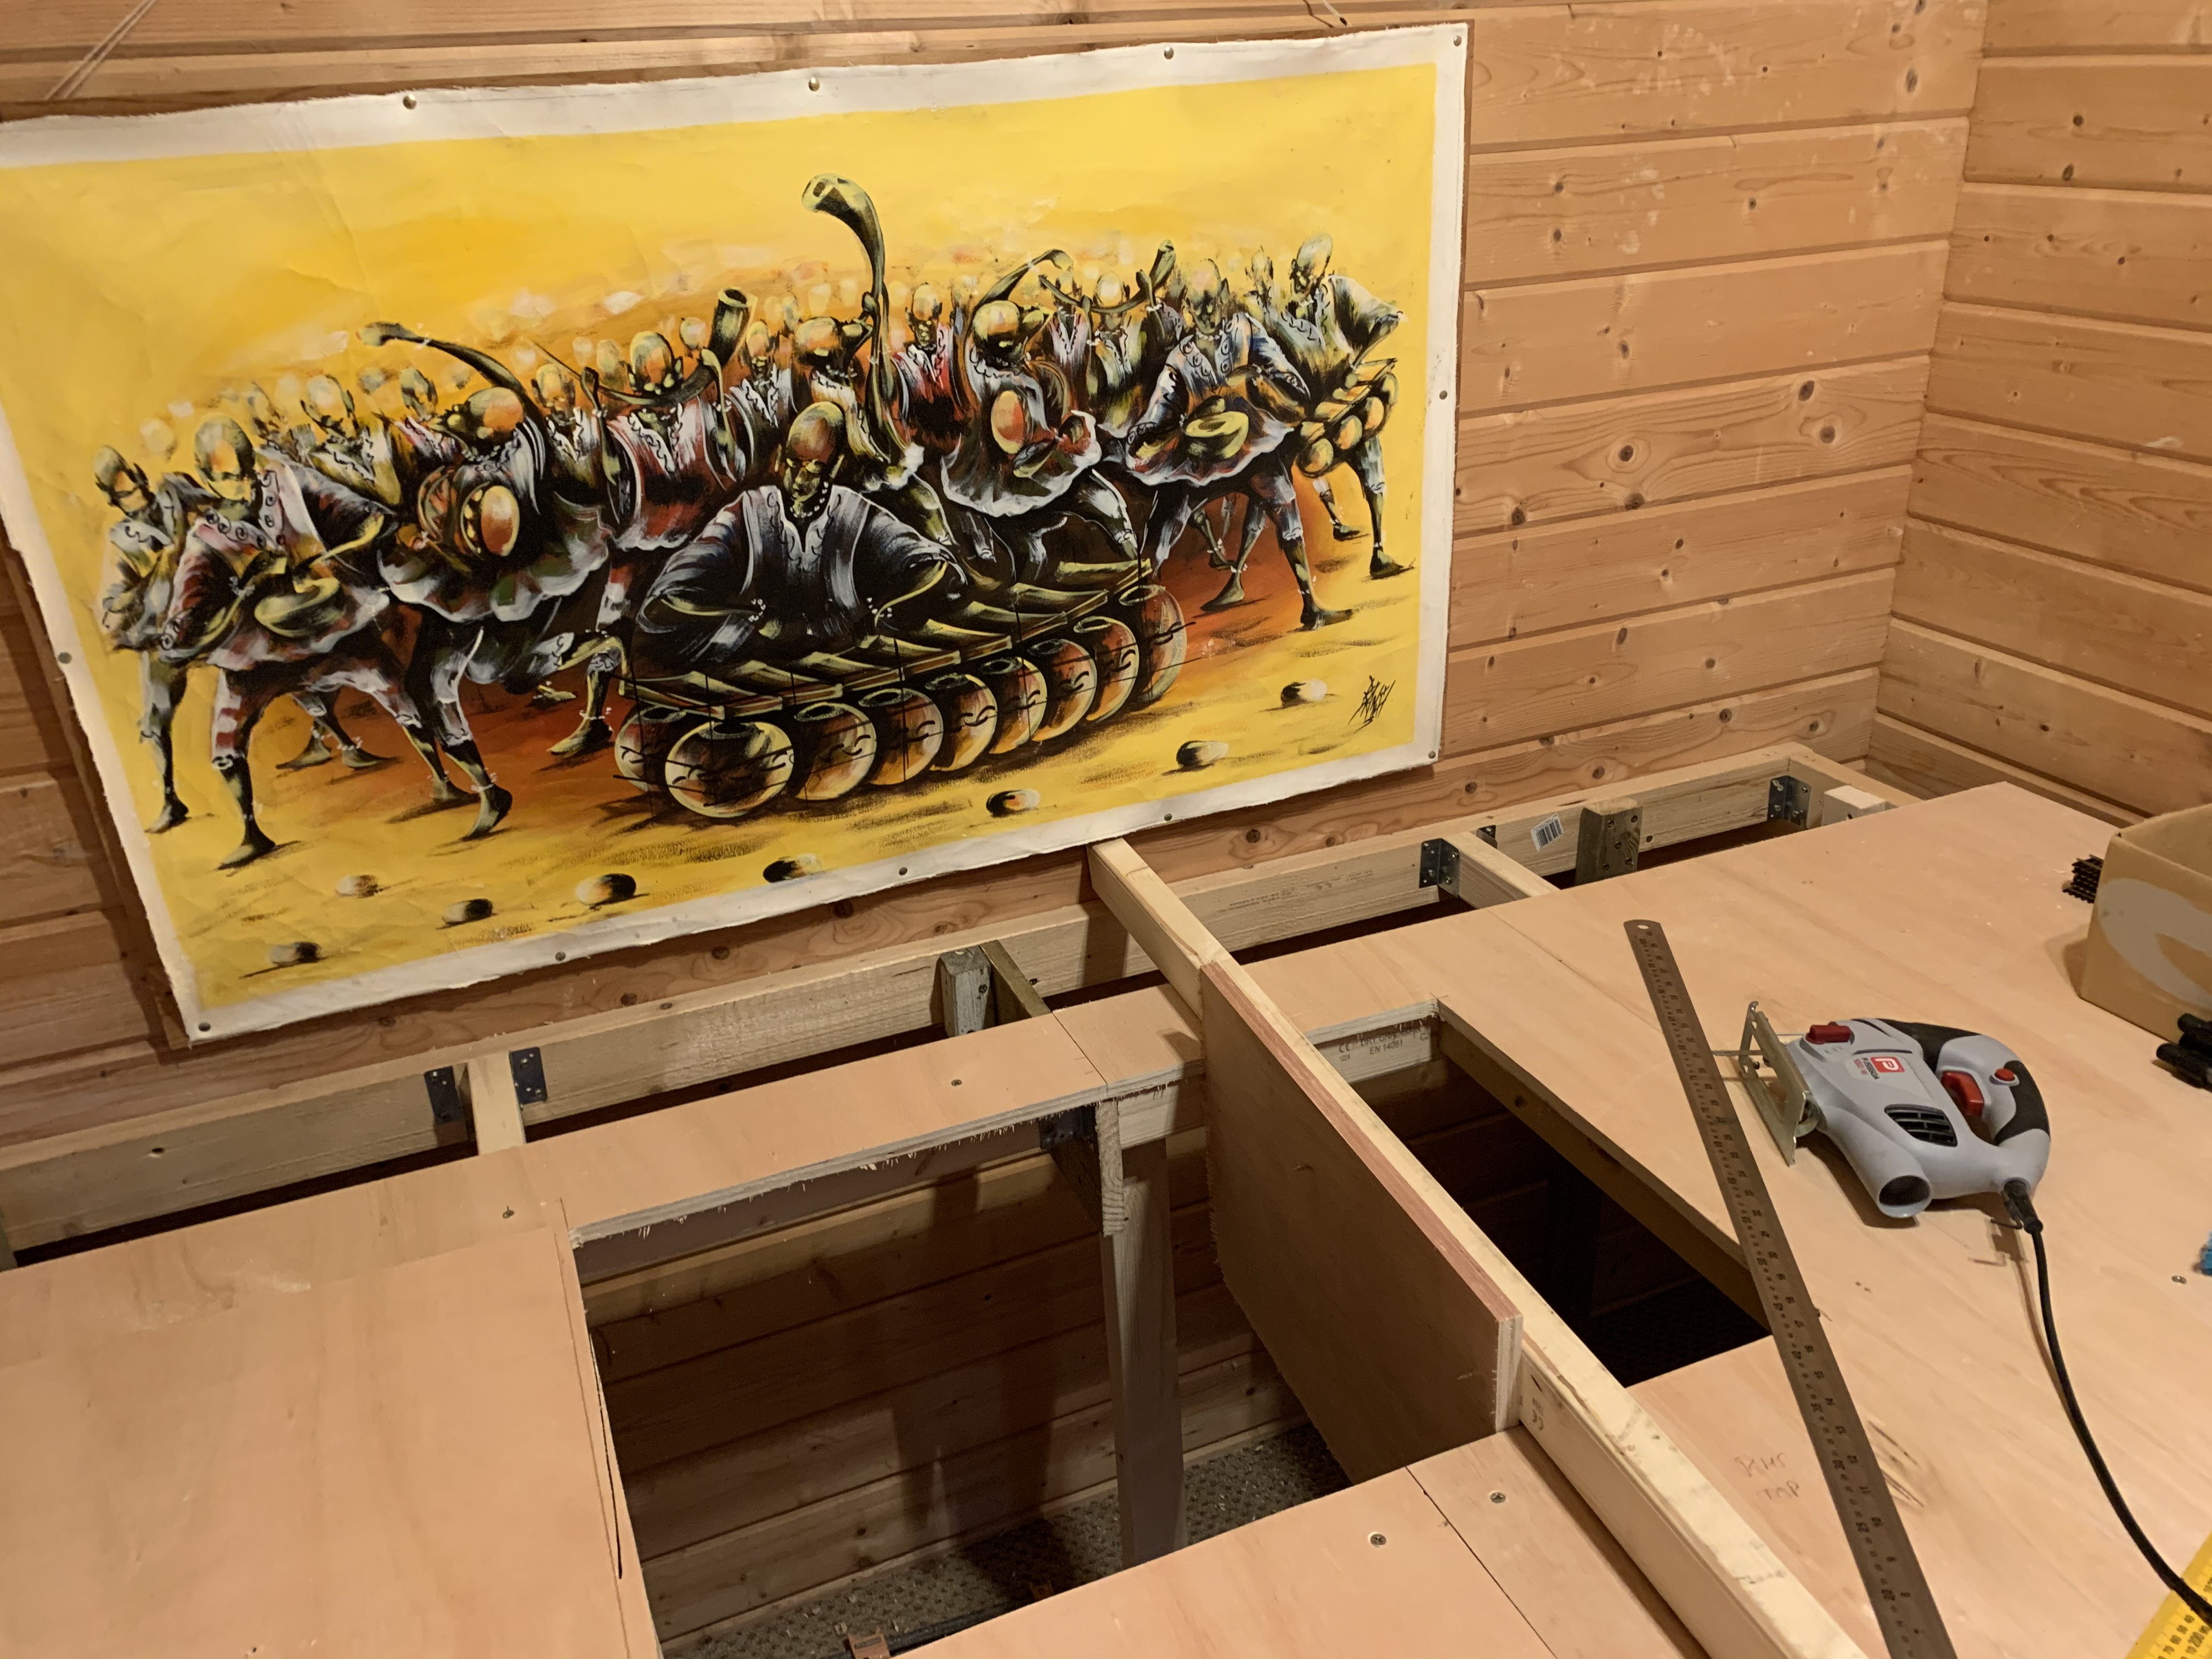
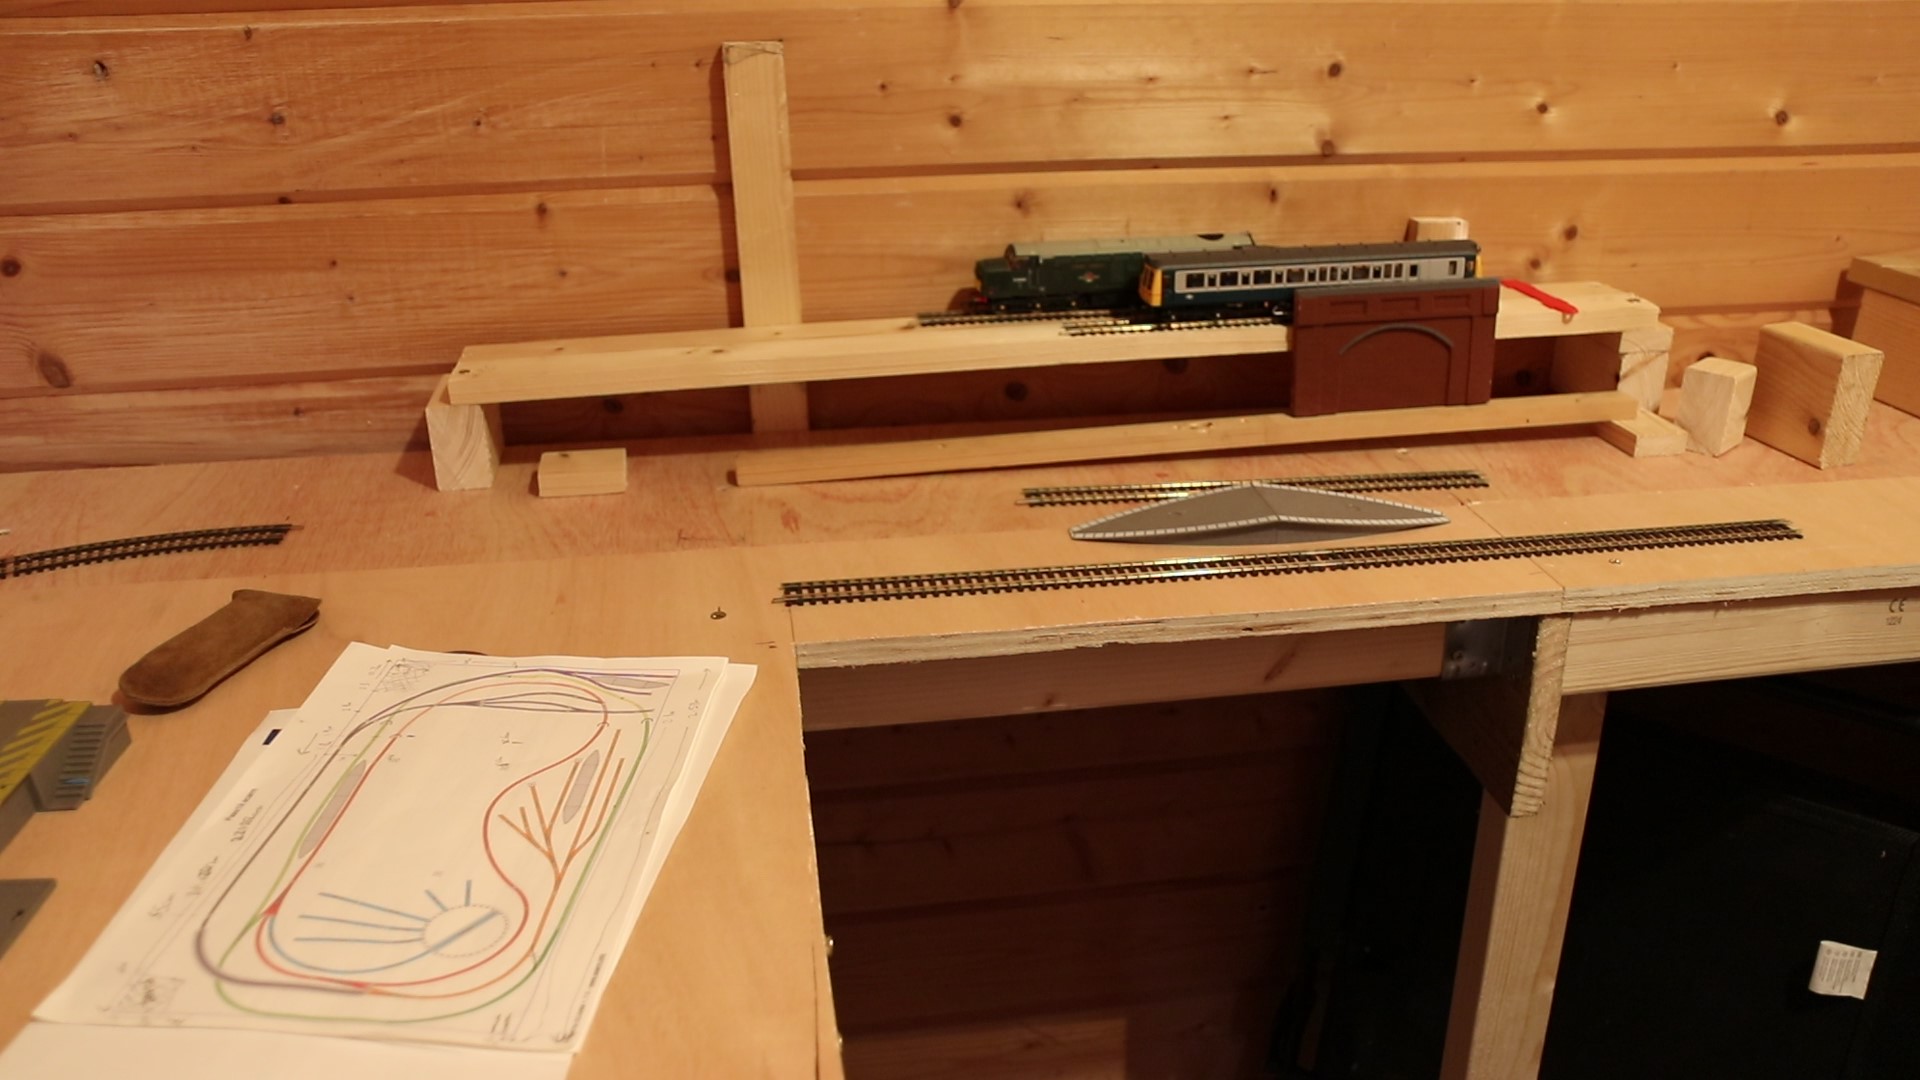
Before you design your layout, design your baseboard, I worked the other way around and it caused me know end of headaches. Once you know how much space you have to play with, be that under the bed, in the shed or in the attic and you know what your budget is you can start thinking about your baseboard. The key thing to keep in mind for any layout is that you should be able to comfortably reach all of the corners of the layout, not only for reaching derailments (which was the only thing I thought about) but also, unless you can remove your baseboards easily you will also need to do all of your scenics with the boards in place... Stretching awkwardly for hour on end is no fun.
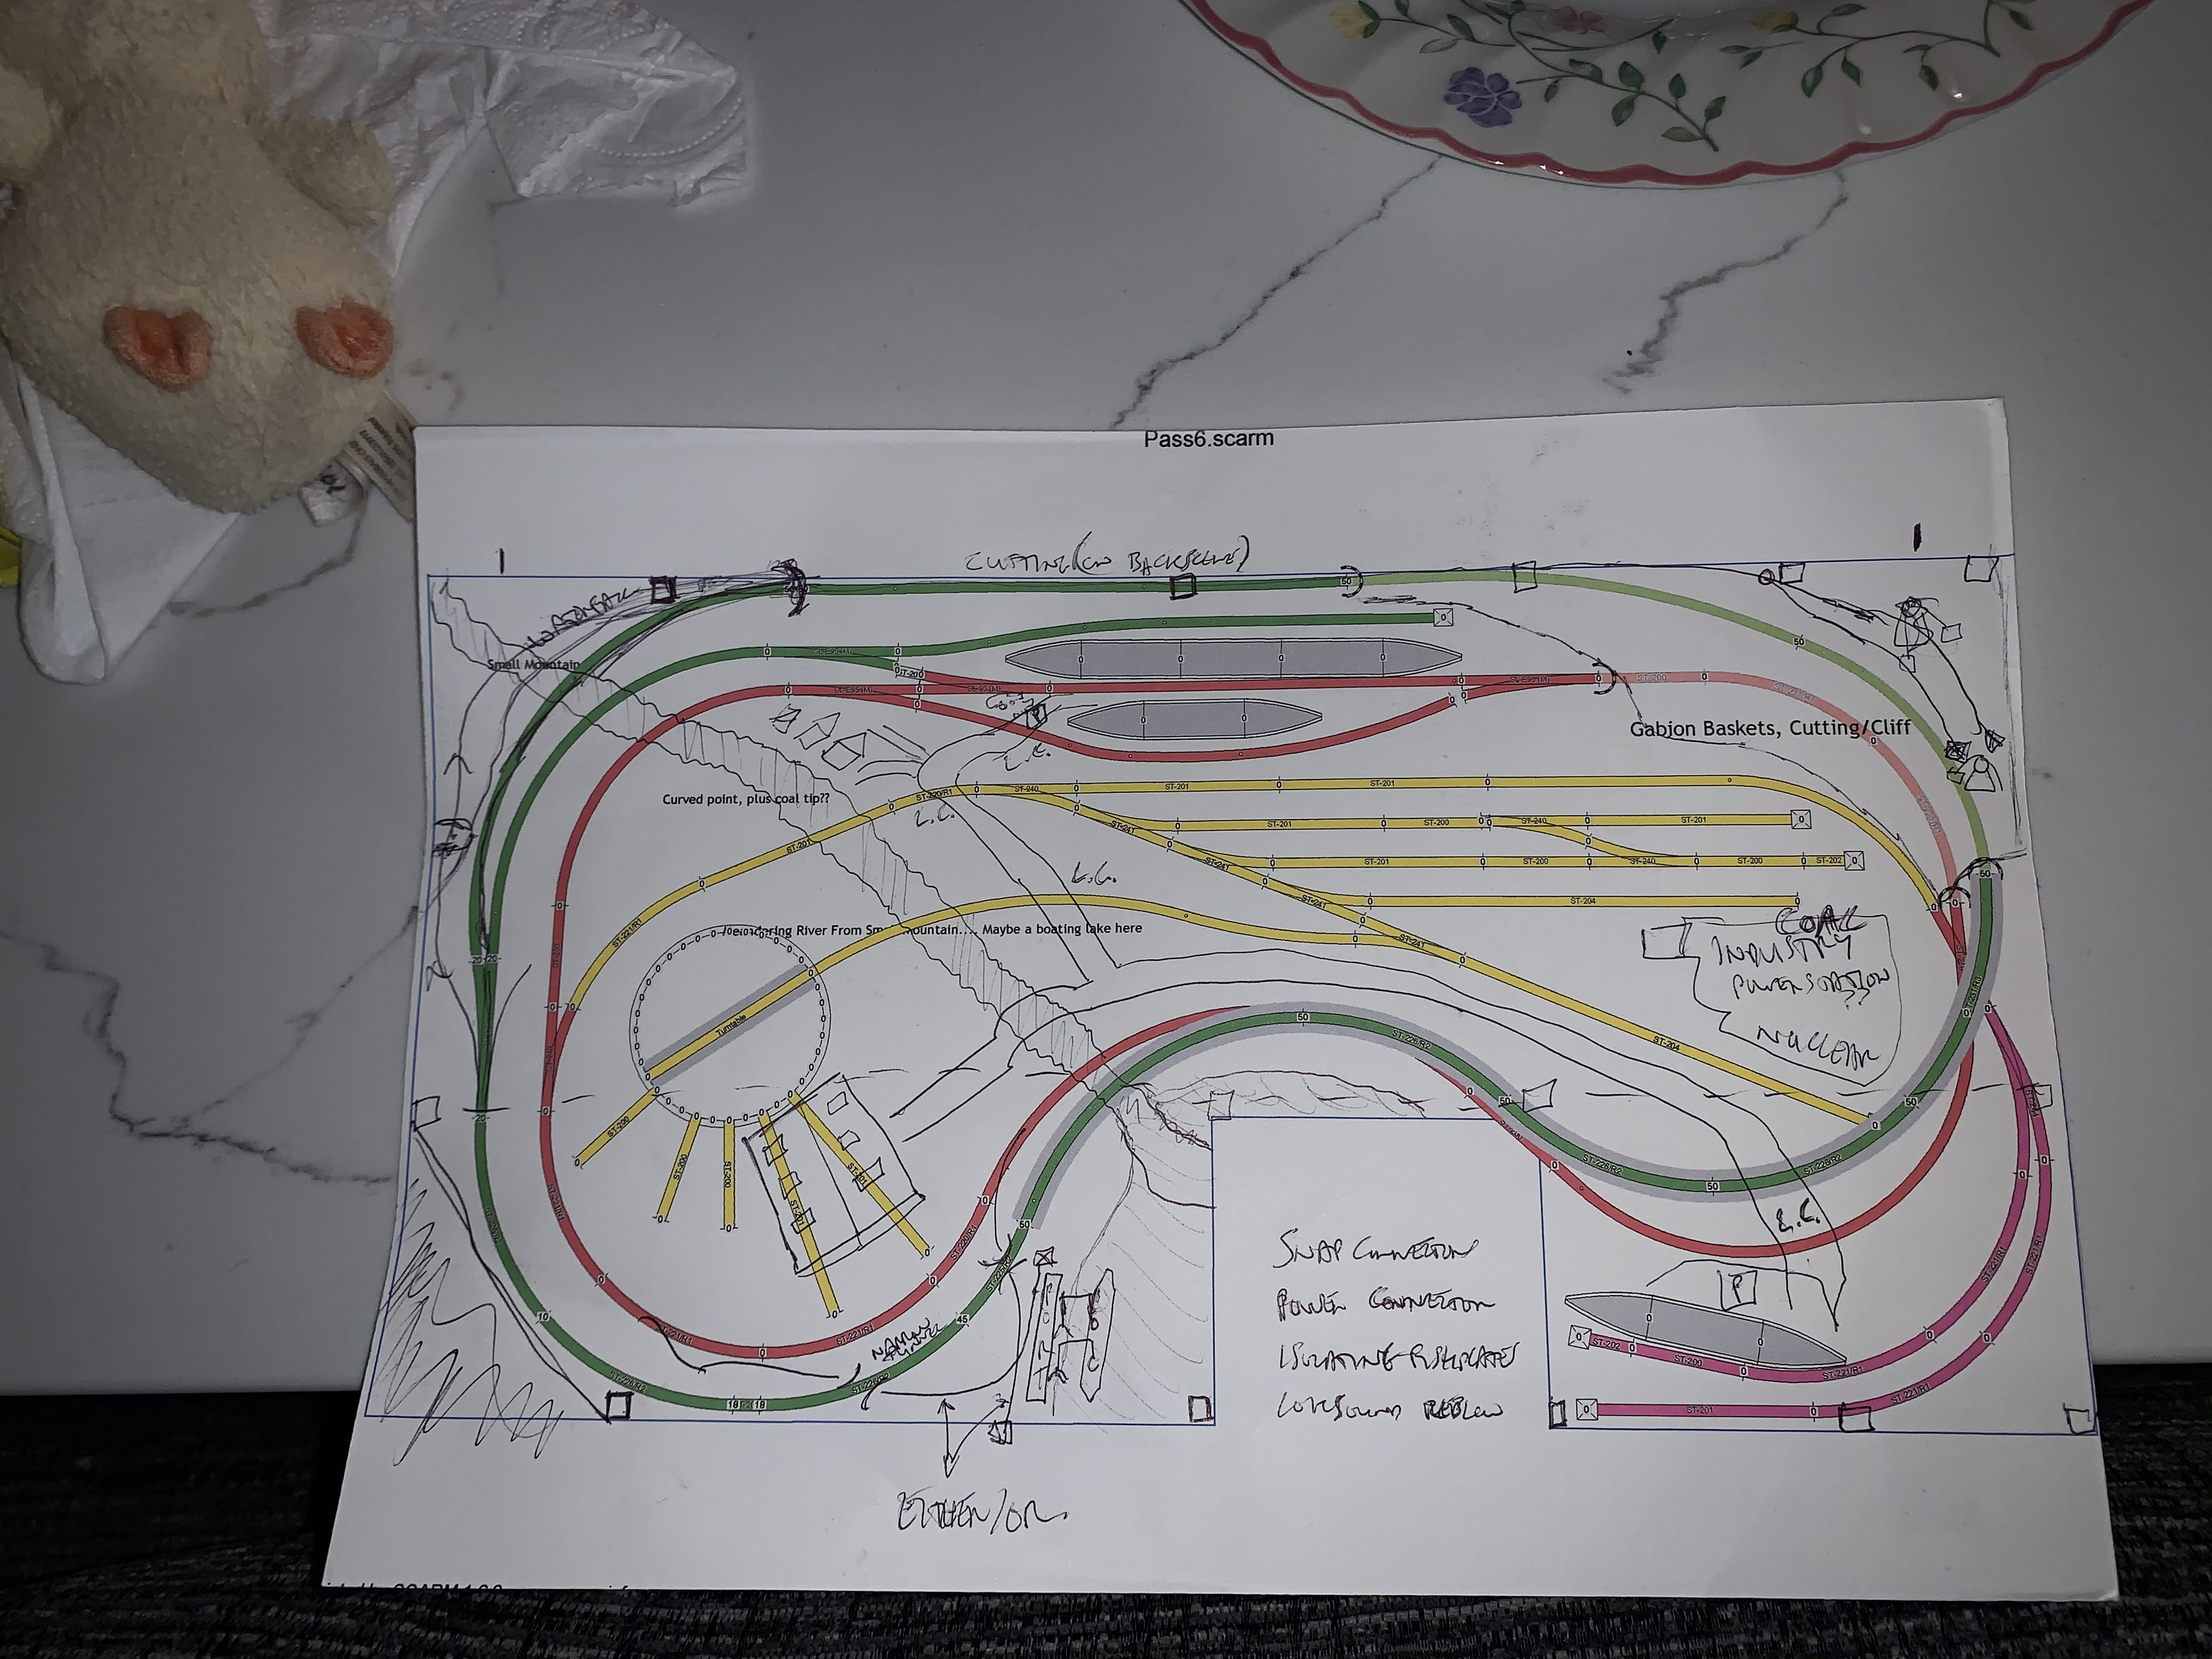
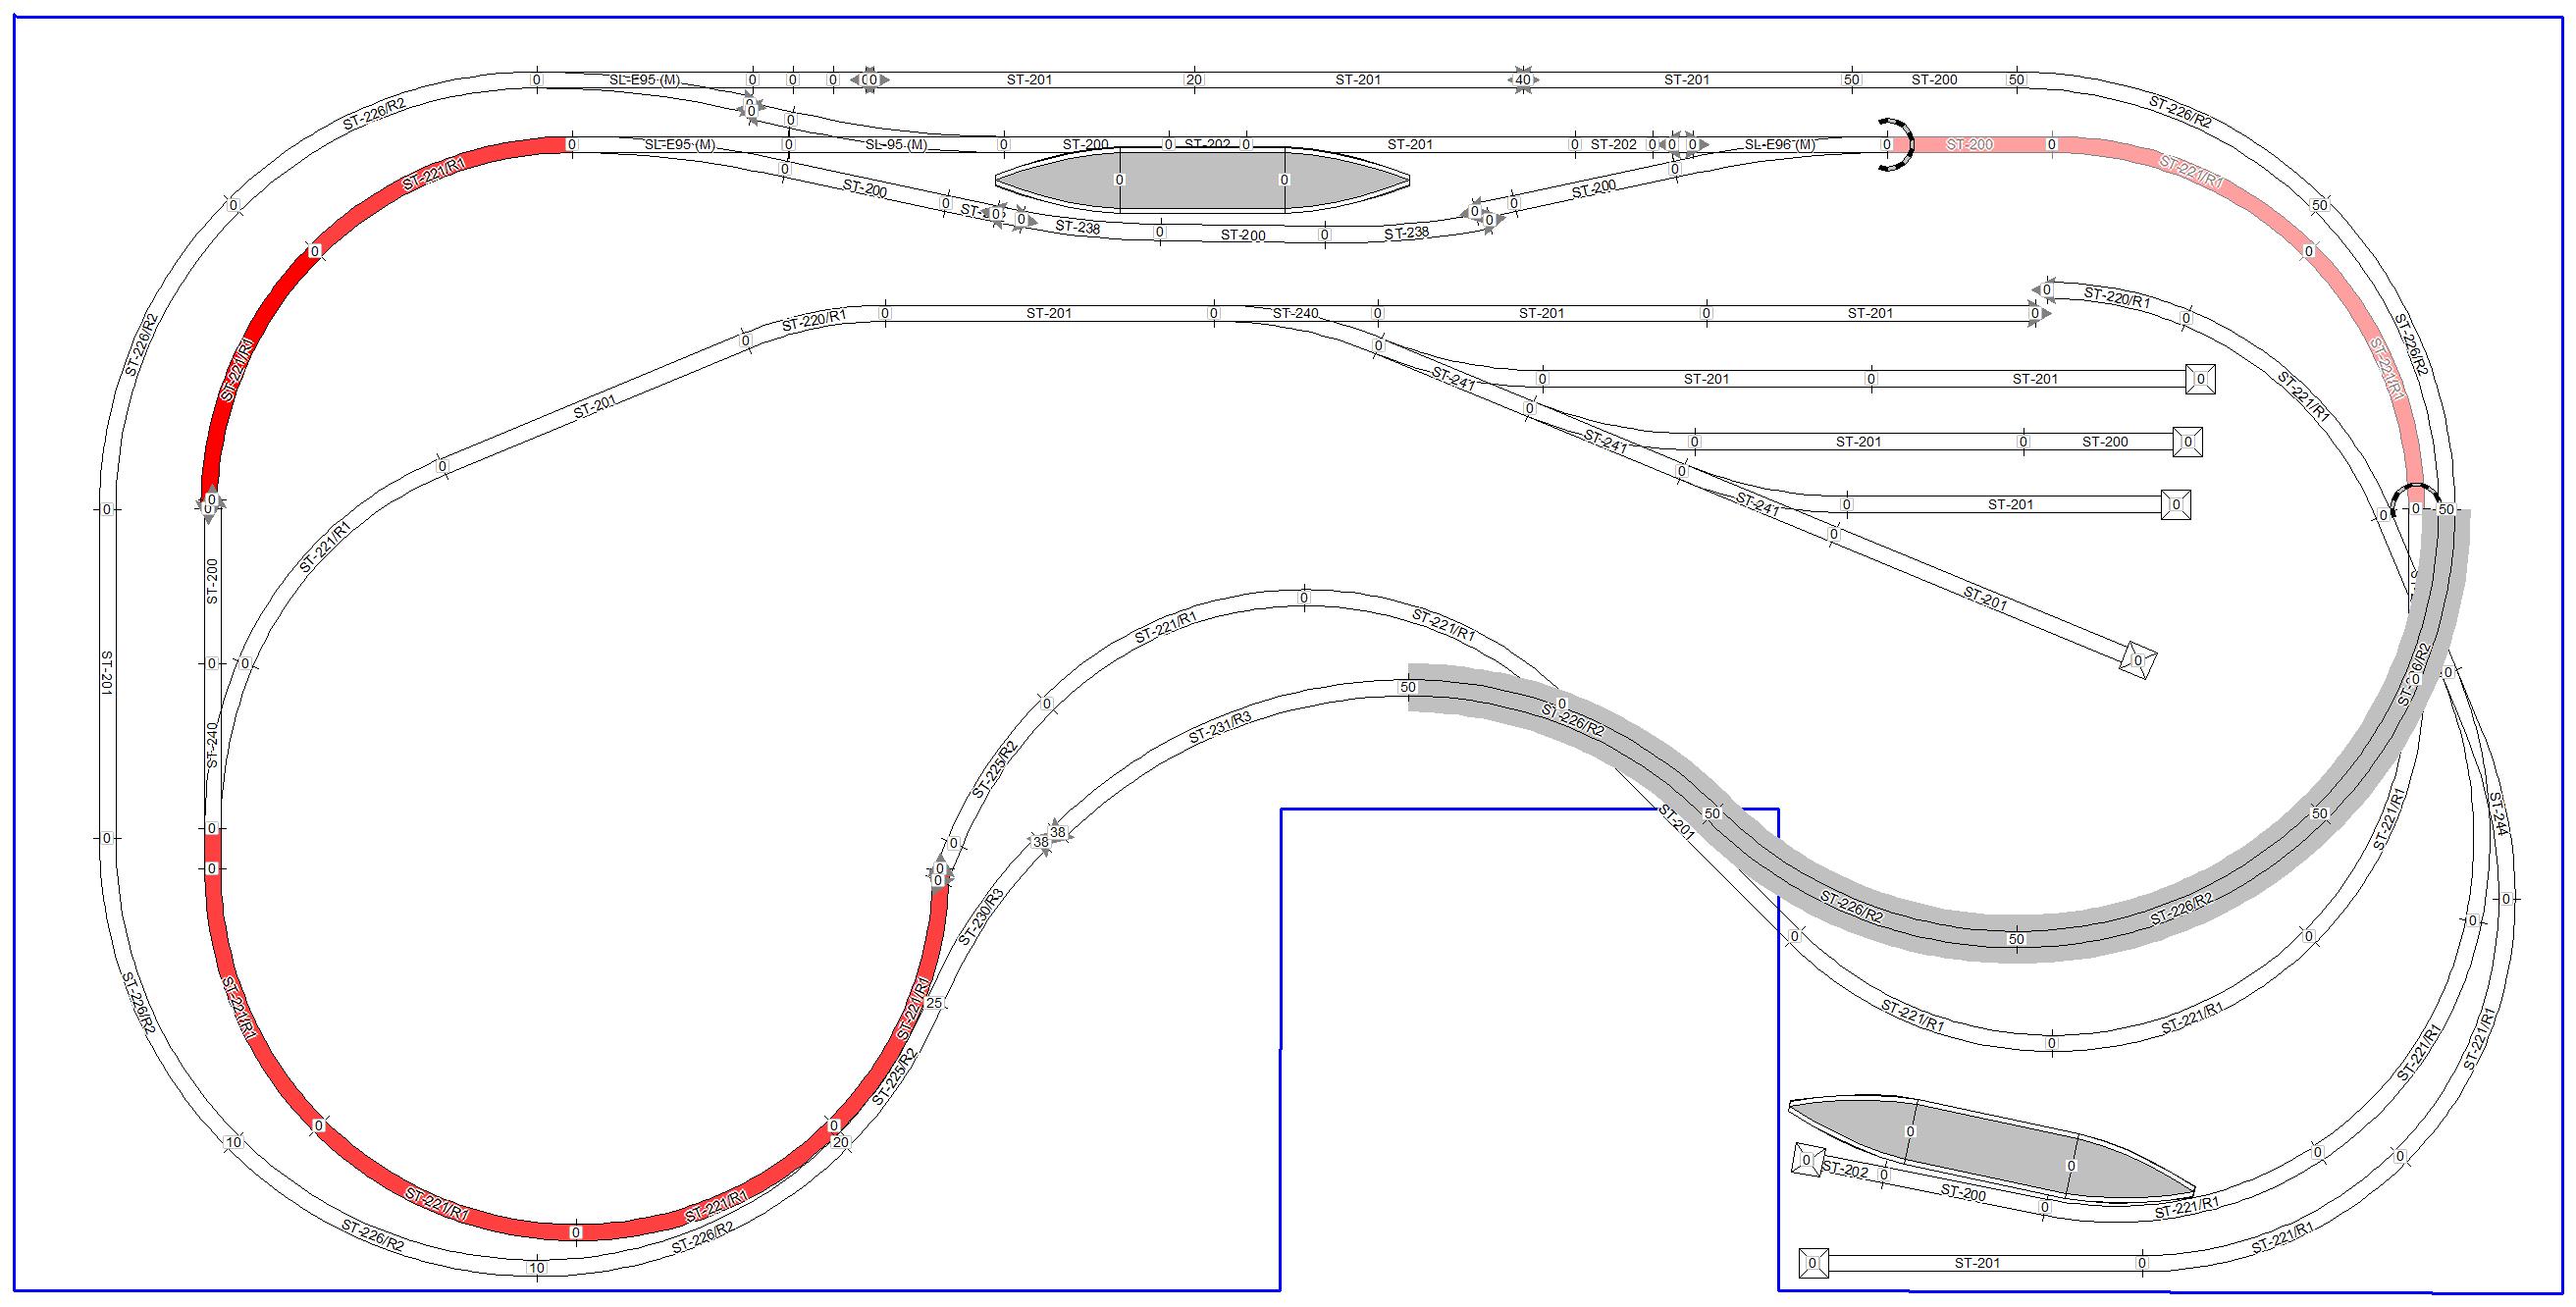
My first pass of the reachability analysis, this is when I realised I needed better access:
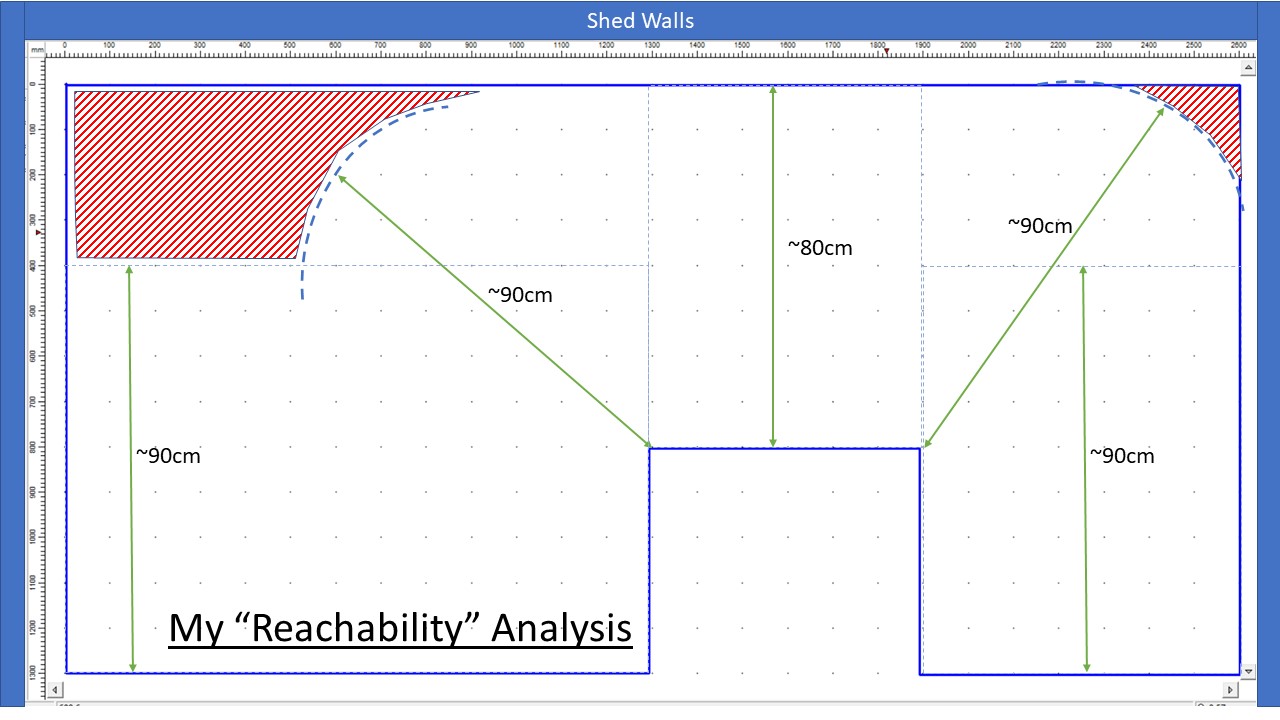
This is very easy to do, mock up your planned baseboard in excel or on a piece of paper (to scale) and then measure how far each point is from each of the points of access, this is particularly important if like me you only have access to one side of your layout. After doing the above analysis I moved from a side access with operator "nook" to a central operator well:
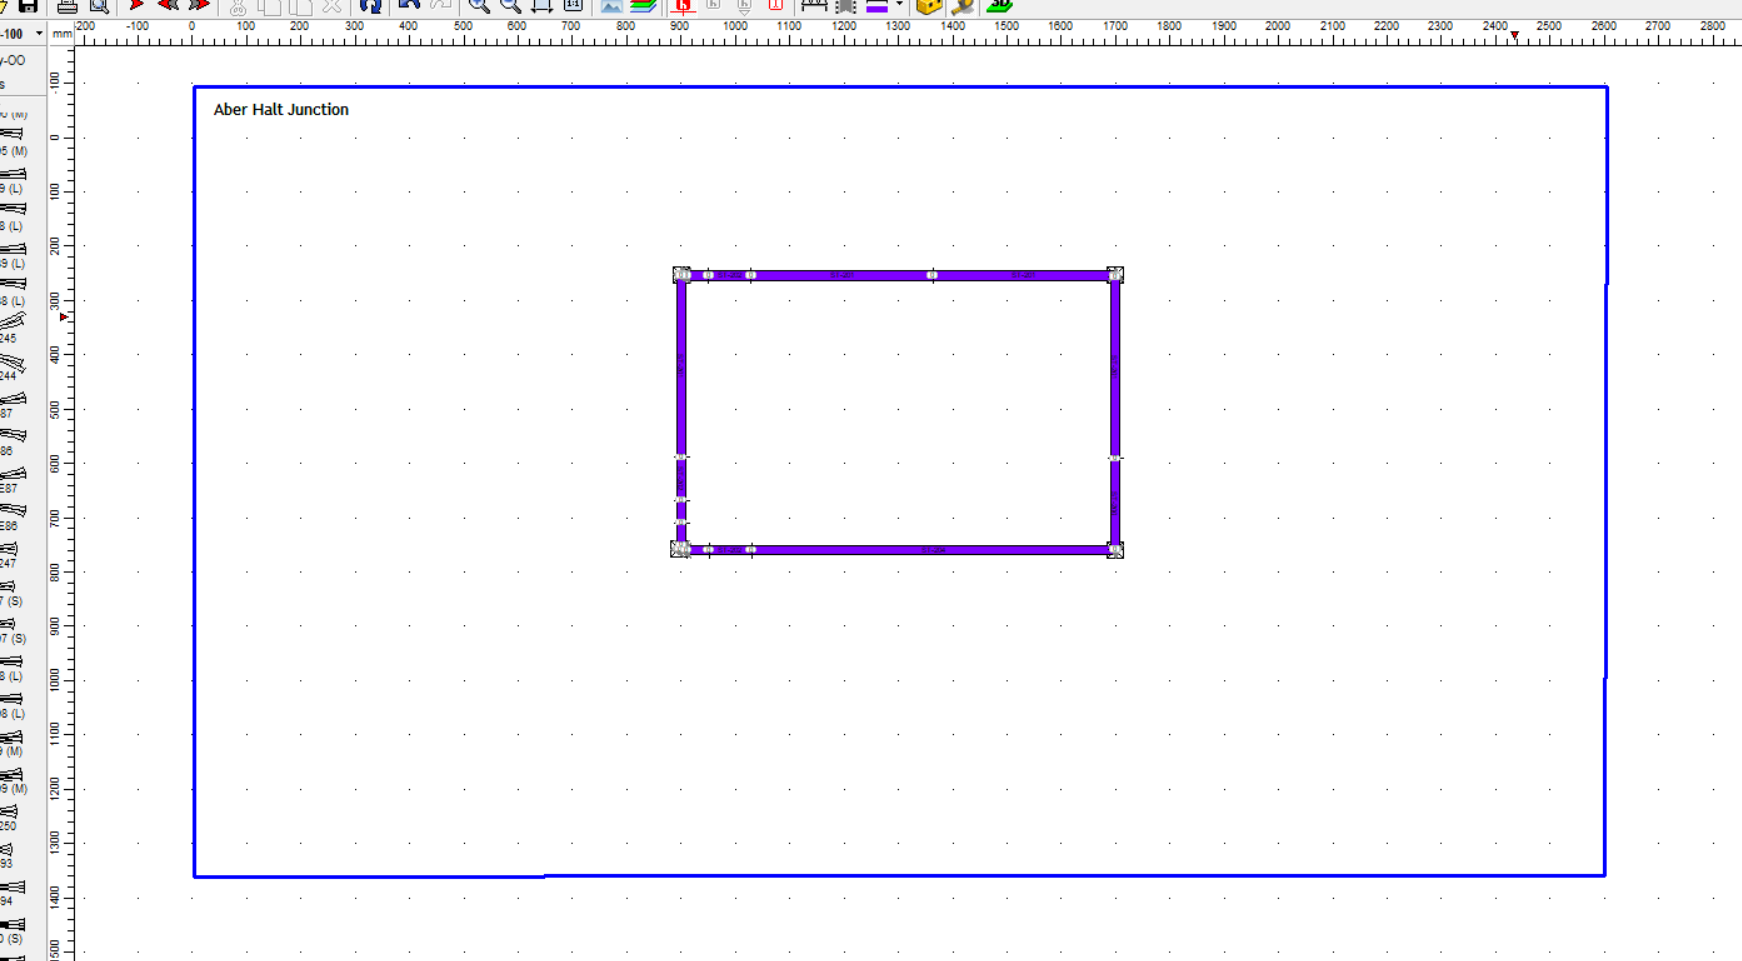
This meant that all of the track was within 80 cm (and the majority much closer than that). It's also important when you are thinking about having mountains and/or tunnels that you can get access inside them for derailments etc. As such I cut a 20 x 20 cm hole in the top right hand corner of the board so I can get under the mountain that takes up the right hand side of the layout (Layout Design) and replace and trains that have derailed due to my rookie track laying mistakes.
Level 2
So, before you can run any trains, you either put your track on a track mat or on the floor (try to keep it as dust free as possible and avoid carpet if possible), or if you can make something semi or completely permanent you build a baseboard. These typically are plywood, chipboard or MDF and are either secured directly to joists in an attic, slid under a bed, or in my case have legs attached to enable it to be at a useful height for building the layout and watching trains run around.
Level 2
Computer aided design sounds like something clever people do to design houses and such. The software packages now available to us Joe/Jane Public have moved on a lot in the last decade or so, they are now much more accessible. I have put together a 20 minute video which will get you all the way from downloading the software, to designing a basic loop, avoiding some of the little niggles and moving on to working with elevations, designing tunnels and bridges, all you need to make your layout sing in 3D. After watching the video below within a couple of hours (for a medium sized layout) you'll have your design completed. The beauty of that then is you can share the design with other SCARM users and collaboratively tweak and refine your layout, I have found it invaluable in enabling me to get my layout from something that originally didn't make a lot of sense to something which I'm really pleased with. Give it a try, it's free to use initially and only $40 to get the full functionality.
Level 1
I think most beginners to this hobby are quite similar to me, wanting to and thinking about taking the plunge to install point motors on their layouts, it adds a nice amount of automation, but not too much. But we're remembering the issues that used to be faced with point motors and only experts in electronic engineering would be daring enough to install them. That's certainly how it felt twenty years ago. Things have moved on, a lot! Things are now a lot more accessible and I think with the addition of these Twistlocks whilst they may not be ideal for everyone for us true rookies they may be worth a look.
For the standard options:
For the PL 1000 + PL1001 (with microswitch):
So there are two options for point motors??? Solenoids and slow action point motors.... Your typical seeps/peco solenoids (details here on this AL) and Cobalt (details here on this AL)

| Solenoids | Slow Action | ||
| Pros | Cons | Pros | Cons |
| Cheap (around 6 - 8 pounds). | Aligning the motor correctly beneath the board is hard, needs practice. Some people have manufactured jigs. | Quiet, no Thud. | Expensive, in the order of £20 - £30, depending on type and amount bought |
| Simple and Robust. | Can require soldering. | Slow action movement | Very big motor, needs a a lot of space vertically and horizontally under the board |
| Thud!!! Some people say they are noisy | Can require soldering, the Cobalt one pictured doesn't. | ||
To clarify I have focussed this page on under baseboard mounting, above board mounting where sometimes required typically brings less options, particularly if you want to hide them well. If I need to do this I will probably just go for the standard hornby option, R8015 for around £6.50 if you shop around (P&P variable) or for ~£6.00 from eBay by clicking the image here*AL.
So the two main cons for typical stereotypical solenoids and for the slow action motors are that they are hard to align and they are expensive respectively. If you are able to put up with the noise (as I am) then there might be a third way....
This is where Peco TwistLock is designed to come in...
They are cheaper than slow action motors (around £11.50-£13.50), they are a bit harder to source, I got mine from Hattons but they've now sold out I've found them on Amazon from Peter's spares (which is a cracking shop by the way!!) for £13.50 but there is £5.00 delivery so you'd have to buy a few to make it worth your while, there's a link here, if you like, just click the picture.
These are the parts I used for the installation, in these strange times I did have to resort to Amazon for 2 of them but got them competitively priced from a small retailer, which always softens the blow:
Switch: https://www.derails.co.uk/index.php?route=product/product&filter_name=peco+pl+26&page=2&product_id=181 £5.90
The Motor: https://www.derails.co.uk/index.php?route=product/product&filter_name=PL1000&product_id=2862 £10.90
The wiring looms (with spade connectors): https://www.derails.co.uk/index.php?route=product/product&filter_name=PL34&product_id=168 £4.50
The capacitor Discharge Unit (paid link): here £16.33 from through eBay.
The Gaugemaster Power Supply, including adaptor (paid link): here £18.15.
I have never actually made anything (literally) from Amazon links, but if I ever do I intend to use the millions of pounds I make to fund my website and also allow me to branch out a bit and do more reviews, as to some extent these point motors are, thanks for clicking.
They are also pre-wired, I must be frank, when I was younger (this is my second visit to this wonderful hobby, now I have a shed :) ) soldering scared me, I have since grasped the nettle and have soldered a few things on my layout. However I am still not fully comfortable soldering fragile components. These motors are fully pre-wired, I was able to wire them up and make them fire (YouTube video to follow) with a massive amount of ease, in less than 5 minutes and I am not very electrically proficient. The wiring diagram (of any motor) can be quite scary, but I recommend you watch this video and see how easy it really is, no soldering required. I need to stress again these are fully pre-wired, the wiring loom from the motor has already been connected, they are ready stripped so you can just use a chocolate block or Wago or other type of connector, see here:
.jpg) |
.jpg) |
.jpg) |
Now, this is where they really come into their own, my carpentry skills are not great, especially with my big fingers! I watched 2 videos in particular on YouTube which showed that the installation of standard point motors can be quite a challenge, particularly aligning the bar from the point motor with the hole in the point tie bar. This is the video here, of me installing the point motor, it's done in real time, without the cameras rolling I probably could have done the installation in 10 minutes.
It worked! First time, no adjustments required, flawless. I can't speak highly enough of the layout diagrams that peco have developed, very easy, very neat to follow. I wish they'd selected Phillips head screws though! But other than that small criticism I have no others...
I have around 16 points on my layout and I plan on installing point motors on all of them. I am set on using solenoids, I don't mind the noise, however I don't like fiddling under my baseboards (which are fixed). There is around a 6 pound premium in using Twistlocks over standard solenoid motors, for me this is around a 60 quid premium for the whole layout. I think for the ease, convenience and robustness that TwistLocks provide I am going to go for TwistLocks across my layout. I was able to seamlessly install it first time, I only have 2 hours with my layout every week, so this ease is invaluable. Adding microswitches will add a bit more cost, but they are also twisted into position, which is so easy, I will also be adding them. I'd be keen to hear your feedback on these motors, they are very sparsely reviewed (which makes me nervous) so any insights you have would be gladly received, please email me and I will collate the feedback into a community feedback section below. There were two comments on RM Web about loose wires, I have 6 motors and haven't experienced this problem, let me know if you have.
Level 3 (mainly due to some soldering)
There are two quite common queries on social media regarding TTS sound decoders, well actually 3 (the third one being "are they any good?"). The first two however which is the focus of this How To is:
1. Are they easy to install, could a beginner do it?
2. How do you get around the fact that the speakers provided with the TTS chips do not fit in many older (or Railroad) locos.
Level 2 (have small screwdrivers to hand)
As a Brucie bonus on my TTS video I snuck in a little snippet (7 mins!) on how I replaced the driveshaft on my Class 37. It went from being a really good runner, to an absolute stinker. I found the driveshaft on the layout a few weeks before and I had no idea what it was at the time, it just looked like a bit of plastic. Luckily I didn't chuck it away and instead kept it in my odds and sods box, thank God I did. When I took the body off to install the TTS decoder I realised that one of the bogies was not powered and suddenly it dawned on me why the 37 had become such a poor runner. This is not an incredibly complex fix, however I would recommend good lighting and you will need a couple of screwdrivers to make sure you get all of the component parts aligned (the driveshaft has  two T pieces at either end and the motor and the bogie have a slot in them, you need to make sure these are all aligned).
It's a frequently asked question, can a beginner do a sound decoder install? can a beginner solder a speaker onto a sound chip? In this video I show you the hints and tips I've picked up over my four or so installs, but not an expert by any means, so you get the beginners perspective and things to look out for. Enjoy!
One thing to bear in mind with this, is that installs from a shop etc can cost in the order of 15 quid (after parts). A soldering iron costs around 30 quid, so after 2 installs you're quids in, and as a bonus you have a soldering iron. Buying peco droppers costs around 2 quid per set, with a soldering iron you can make your own!! Soldering is not as scary as it first appears.
As promised in the Beginners DCC install video, this is me removing my Class 121 body, way back when!! I didn't want to put it back on again to film the video, so just thought I'd share this private video (it's not visible on YouTube) with you so you can see how it's done. Apologies for the video and sound quality!!
I hope you enjoy your visit around my website, I hope you find it is an improvement on my last incarnation. If you have something which puzzled you for ages and then you managed to fix, please feel free to share it with me, I'm sure you won't be the only person who has the issue. Please feel free to drop me an email, sign my guestbook (very 80's I know) or tweet me with any recommendations that you may have, I'm always learning.
|
 |
 |
 |
 |
Read all about it on my home page here.
My Hornby Amazon Link: 
Contact me with any comments or questions, I'm always keen to learn:
OOGauge; Model Railways; Model Railroad; aberhaltjunction; hornby; hornby select; dapol; class 121; ESU; Loksound V5.0; Hobby; Shed; Class 121; Class 37; Beginners; Trains